How to Find All Video Files on Mac (and Verify Them)
Published · 9 min read · By Long Road Software LLC. AI writes this article and checks it against its sources, the app and the manual; Mike does not review each one. How we write these articles.
Key takeaways
- Finder’s Kind is Movie search only lists files macOS recognizes as movies, so camera originals such as .braw, .r3d and AVCHD folders can be missed.
- Search camera formats by file extension, and keep GoPro chapters (GX01xxxx, GX02xxxx) together, because one recording can span several files.
- Footage inside Photos, iMovie and Final Cut libraries does not show up as separate files in Finder, so manage those libraries from their own apps.
- Use mdfind on indexed drives and find or du on network shares and drives Spotlight does not index.
- Before you delete or erase anything, compare file counts and byte totals, then compare SHA-256 checksums of the copies.
To find all video files on a Mac, start with a Finder search for Kind is Movie, then widen it. Search camera formats by extension, look inside Photos, iMovie and Final Cut libraries, and filter out proxies and render files. Then check the list with file counts, byte totals and checksums before you move or delete anything.
The steps below work for one Mac or a stack of archive drives. Most of them use tools already on your Mac: Finder, Spotlight and Terminal.
How do I search for all video files in Finder on a Mac?
A Finder search by kind is the quickest start. Open a Finder window, press Command-F, and set the first rule to Kind is Movie. You can also type kind:movie in the search field. Apple’s guide to narrowing search results in Finder covers the rules and the Option-key trick for Any, All or None.
For a broader search, choose Other in the rule menu and add the Raw Query attribute. Then enter kMDItemContentTypeTree == "public.movie". That query matches every file Spotlight has filed under the movie type, whatever its extension. Add a second rule such as Name ends with .mp4 to narrow it.
Save the search as a Smart Folder you can rerun
A saved search keeps the inventory repeatable. Click Save below the search field and give the search a name. Apple calls this a Smart Folder. It updates itself as files change, so you can open it again next month. Make one per drive if you keep footage on several drives.
Why the Kind is Movie search undercounts
Spotlight only knows a file is a movie if macOS recognizes its format. Camera formats that need the maker’s own software may be filed as a document, or not given a movie type at all. Blackmagic RAW (.braw) and RED (.r3d) are common examples. Spotlight also skips drives it has not indexed and folders listed in its privacy settings. So treat the Finder result as a first list, not the full count.
Which video file formats should I search for beyond .mov and .mp4?
Camera originals come in more containers than .mov and .mp4. Search for each extension on its own. In Terminal, find walks every folder on a drive, including package folders, and does not depend on Spotlight:
find /Volumes/Footage -type f \( -iname '*.mts' -o -iname '*.m2ts' -o -iname '*.mxf' -o -iname '*.braw' -o -iname '*.r3d' -o -iname '*.360' -o -iname '*.insv' \)
Camera formats that are easy to miss
| Camera or source | What to search for | Why it gets missed |
|---|---|---|
| Sony, Panasonic, Canon AVCHD | .mts and .m2ts inside an AVCHD folder | Finder shows the AVCHD folder as a single package |
| GoPro HERO | .mp4 named GX or GH plus chapter and file number | One recording can be split into several chapter files |
| GoPro MAX | .360 | Not a standard movie extension |
| Insta360 | .insv | Not a standard movie extension |
| Blackmagic cameras | .braw | May not be recognized as a movie without Blackmagic software |
| RED cameras | .r3d | Same as .braw |
| Broadcast and cinema cameras | .mxf | Often not filed as a movie by Spotlight |
GoPro chaptering deserves special care. GoPro’s file naming page shows the pattern: GX010042 is the first chapter of file 0042, and GX020042 is the second. Copy or archive the chapters of one file together, or you keep only part of a recording.
Sidecar files that travel with footage
Small files sit next to many clips. A GoPro writes .LRV low-resolution copies and .THM thumbnails. A DJI drone writes .LRF previews and .SRT flight data. Sony, Canon and Nikon cards carry XML and index files. You do not have to count these as footage, but keep them with the clips when you copy a whole card. Our post on where cameras hide clips on an SD card lists the folders by brand.
How do I find videos inside Photos, iMovie and Final Cut libraries?
Photos, iMovie and Final Cut Pro keep media inside a library file. Finder shows each library as one item, so a Finder search does not list the clips inside it. You can look with Show Package Contents, but don’t move or rename anything in there by hand. Manage the media from the app that owns the library.
Photos library: originals and Optimize Mac Storage
The Photos library holds your originals in its own internal folders, named in a way that is not meant for people. To get a clip out, select it in Photos and export the unmodified original. If iCloud Photos is on with Optimize Mac Storage, the Mac may keep only smaller versions. Apple’s page on optimizing storage in Photos explains the setting. Choose Download Originals to this Mac before you count the library as a complete copy.
Final Cut Pro and iMovie libraries
A Final Cut library keeps each event’s imported media in an Original Media folder. Generated files sit beside it: render files and transcoded proxy or optimized media. Final Cut can also leave media in place on another drive, so some clips may not be inside the library at all. Check the library’s storage locations in Final Cut before you assume a library holds everything. iMovie libraries hold imported originals too, so don’t treat an iMovie library as disposable.
How do I exclude proxies, renders and cache files from my video search?
Derivatives often sit right next to real clips. Leave these out of an inventory of originals:
- GoPro and DJI previews: .LRV, .THM and .LRF files
- Final Cut generated media: anything under Render Files or Transcoded Media inside a library
- Editing app caches: cache folders that editing apps create for previews and waveforms
A quick test helps. If a file’s path contains Render, Proxy, Cache or Transcode, it is likely a generated file, not an original.
A Terminal search with mdfind and grep
The mdfind command runs Spotlight queries from Terminal. The mdfind reference on SS64 lists its options. Pipe the result through grep -v to drop generated files:
mdfind -onlyin /Volumes/Footage 'kMDItemContentTypeTree == "public.movie"' | grep -viE '\.lrv$|render files|transcoded media|proxy|cache'
The -onlyin option limits the search to one drive or folder. The grep -viE part removes any path that matches those patterns, ignoring case.
How do I find large video files taking up disk space?
Spotlight records file sizes, so one query can list the big files. This lists every movie file over 1 GB on the drive, largest first:
mdfind -0 -onlyin /Volumes/Footage 'kMDItemContentTypeTree == "public.movie" && kMDItemFSSize > 1073741824' | xargs -0 ls -lhS
The -0 and xargs -0 pair keeps file names with spaces intact. For the internal drive, Apple’s Free up storage space on Mac page shows where to look. On macOS Ventura and later, that is System Settings > General > Storage.
Ranking files on drives Spotlight does not index
Network shares and some external drives are not indexed by Spotlight. Use find, which reads the folders directly:
find /Volumes/Archive -type f \( -iname '*.mov' -o -iname '*.mp4' -o -iname '*.mxf' \) -size +1G -exec ls -lh {} +
For a quick view of which folders are biggest, du -sh /Volumes/Archive/* | sort -rh | head -20 works too. A Final Cut library shows up as one large item. Much of its size can be render and proxy files. Final Cut’s own Delete Generated Library Files command removes those safely, as Apple’s render files guide describes. The originals stay. For drives you keep long term, see our guide on external hard drive organization for video.
How do I verify the list is complete before deleting or moving anything?
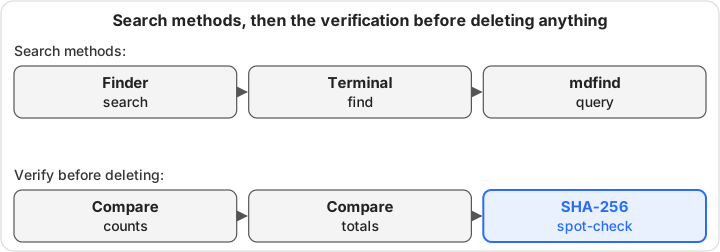
A copy that finished is not a copy that matches. Finder’s progress bar tells you the files were written, not that every byte arrived intact. Check counts and totals first, then checksums.
Compare file counts and byte totals
Run the same two commands on the source and on the copy. The first counts files, skipping hidden files such as .DS_Store. The second adds up their sizes in bytes:
find /Volumes/CARD -type f ! -name '.*' | wc -l
find /Volumes/CARD -type f ! -name '.*' -exec stat -f %z {} + | awk '{s+=$1} END {print s}'
Both numbers should match exactly. Folder sizes from du can differ between drives with different formats, so compare bytes rather than disk usage.
Spot-check with SHA-256
Matching counts and totals do not prove that the contents match. A checksum does. Run shasum -a 256 on a clip on the source and on its copy. If the two values match, that copy is identical. Hashing every file by hand takes a long time on a full card, so many people spot-check the largest clips and the last ones shot. Our post on checksum verification before erasing a card explains when a spot check is not enough.
Where MediaFlowSwift fits
MediaFlowSwift, our Mac app, does this check for every clip it organizes. As it copies a clip, it computes the original’s SHA-256. With the default setting on, it then reads the copy back in full and compares. Clear Card deletes from a card only clips whose organized copy it has checked. The manual’s How MediaFlow Verifies Copies section says what each check proves.
For footage already on your drives, File > Create Project From Folder catalogs a folder and its subfolders without copying or moving anything (manual). With the optional shared database connected, Database > Find Duplicates lists clips of the same file across projects and deletes nothing (manual). MediaFlowSwift does not import every format yet. AVCHD (.mts and .m2ts), MXF, BRAW, R3D and Insta360 files are left out, so the Terminal searches above still matter for those.
How do I safely consolidate found video files without breaking projects?
Copy first, then delete
Copy, verify, then delete. A move that stops halfway can leave files split between two places with no clear record of which copy is whole. Copy the files to the archive drive, compare counts, totals and checksums, and only then remove the originals.
Numbered drives and one folder pattern
Give every archive drive a number and the same folder layout, for example ARCHIVE_03/2026-01/2026-01-15_GoPro/. When drive 03 fills up, drive 04 starts with the same layout. You can then tell which drive holds a shoot date without plugging in every drive. Our guide on how to organize video footage goes deeper on folder names.
Relinking projects after a move
Editing projects point to files by location, so a move leaves clips offline until you relink them. In Final Cut Pro, select the clips or the library and choose File > Relink Files, as Apple’s relink guide shows. In Premiere Pro, select the offline clips and choose Link Media. Keeping the same folder layout on the new drive makes relinking much faster, because the app finds the other files once you locate the first.
If a project uses proxies, relink the camera originals and then the proxies, or make new proxies.
A manual inventory works well for a few drives a month. If you offload cards every week, an ingest tool that verifies every copy saves time. Hedge’s OffShoot, Pomfort’s Silverstack and MediaFlowSwift are three options. Our post on evaluating video file management software covers how to compare them. If you want to try MediaFlowSwift, the download page has the free trial, and plans lists what each plan includes.
Frequently asked questions
Is it safe to erase my memory card after copying files in Finder?
Not on the strength of the copy alone. A finished progress bar means Finder wrote the files, not that every byte matches. Compare file counts and byte totals between the card and the copy, then compare SHA-256 checksums of the clips. Erase only when they match, or use a tool that reads every copy back and compares checksums before it lets you clear the card.
Why does Spotlight miss some of my GoPro or drone clips?
There are a few usual reasons. A long GoPro recording is split into chapter files such as GX010042 and GX020042, so a search can find one chapter and not the rest. Some camera formats are not recognized as movies by macOS. Clips inside a Photos or Final Cut library are not listed as separate files, and some drives and network shares are not indexed by Spotlight at all.
What is the fastest way to find duplicate video files on a Mac?
Group files by size first, because files with different sizes cannot be identical. Then compute a SHA-256 checksum for each file in a group of the same size. Files with the same checksum have the same contents. Keep the copy that sits in your planned folder structure and remove the other only after checking that no project still points to it.
How do I find all video files on Windows instead of a Mac?
Open File Explorer on the drive you want to check and type kind:=video in the search box. Windows may not tag camera formats such as .mts, .braw or .r3d as video, so also search by extension, for example *.mts. Add size:>1GB to list the large files first, and save the search so you can run it again.
How do I find video files on my iPhone and get them onto my Mac?
On the iPhone, open Photos and look in the Videos media type. To copy clips to the Mac, connect the iPhone with a cable and use Image Capture to copy them to a folder you choose, or import them into the Photos app on the Mac. Check that the iPhone is set to keep originals if you want full-quality files.
Sources
- Narrow your search results in Finder on Mac, Apple Support
- Create or change a Smart Folder on Mac, Apple Support
- mdfind command reference, SS64
- GoPro Camera File Naming Convention, GoPro
- Optimize storage in Photos on Mac, Apple Support
- Manage render files in Final Cut Pro for Mac, Apple Support
- Relink clips to media files in Final Cut Pro for Mac, Apple Support
- Free up storage space on Mac, Apple Support
MediaFlowSwift checks every card copy before anything is erased, files footage into the same folders every time, and numbers your archive drives. Try it free for 14 days on a Mac with Apple silicon, no card asked for.